Create and execute a new pipeline inside an Azure DevOps pipeline itself
- 6 minutes read - 1241 wordsIf you need to create and/or execute pipelines from another Azure DevOps (ADO) pipeline, there’s an ADO extension for the az CLI that will allow us to perform this task, but we will need some preparation steps before running it. Today it’s still a preview characteristic, so it may suffer some changes when reaching general availability.
The first thing you need to know is that there’s a difference between the pipeline definition file, a yaml file, and the actual pipeline that will run. This last one is a logical pointer to the first that is usually created within the web console, but you can also use the CLI or the API to create them.
How to prepare our DevOps project
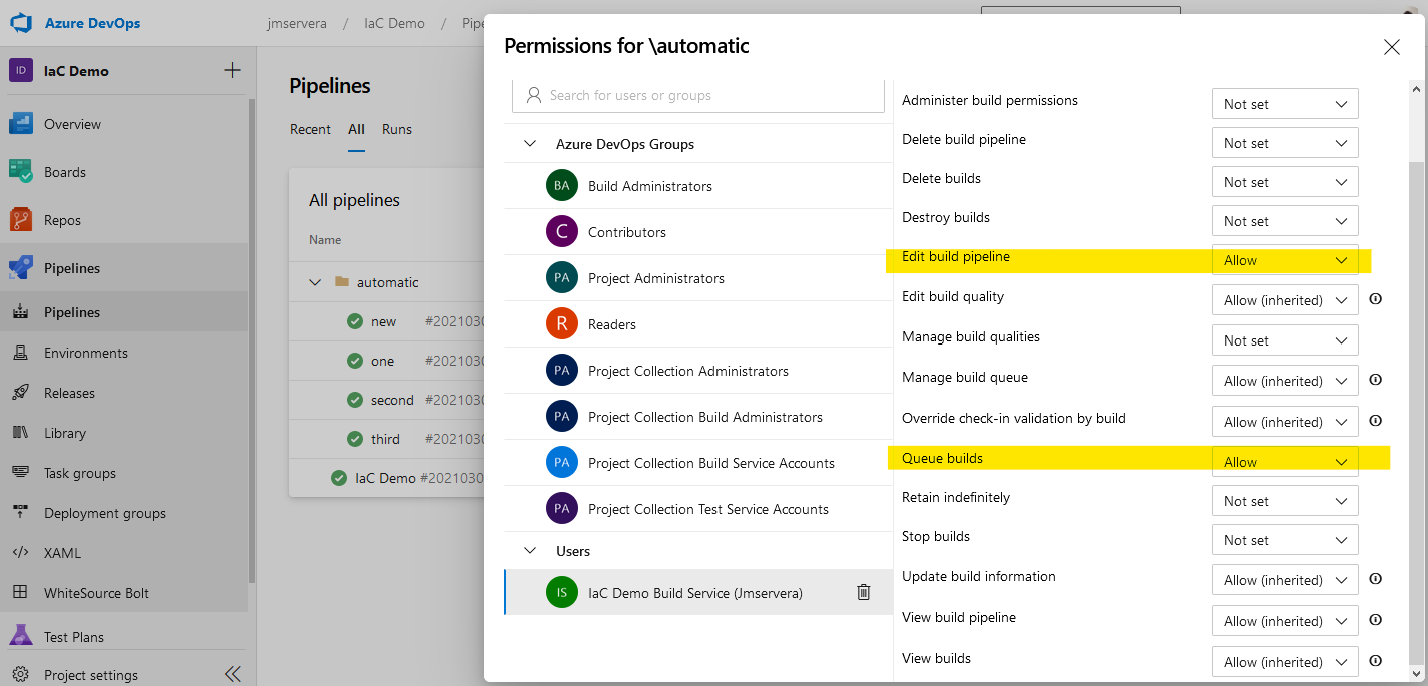
After the project and repository creation, we will need to provide some additional permissions to the service principal that will be used for the creation of new pipelines. If you don’t want to mix the automatically created pipelines with the standard ones, we can create a folder and assign the permissions “Edit build pipeline” and “Queue builds” to the build service account, which is usually created under the name “[Project name] Build Service (user alias)”.
To do this, in the Pipelines section, under “All Pipelines” we create a folder (I created one called automatic). In the right menu select the security option, and there you can assign these permissions to the build service:

Project structure
In the repo, we will create a pipelines folder, with a yaml file for the pipeline. I called it base-auto-pipeline.yml. We write inside the pipeline definition we want to create and execute dynamically. For this example I will create a very simple one that will receive a variable, just for testing purposes:
trigger: none

pool:
  vmImage: ubuntu-latest

steps:

- script: |
    echo Congrats, your variable was set to:
    echo $(testVariable)
  displayName: 'Run a test script'
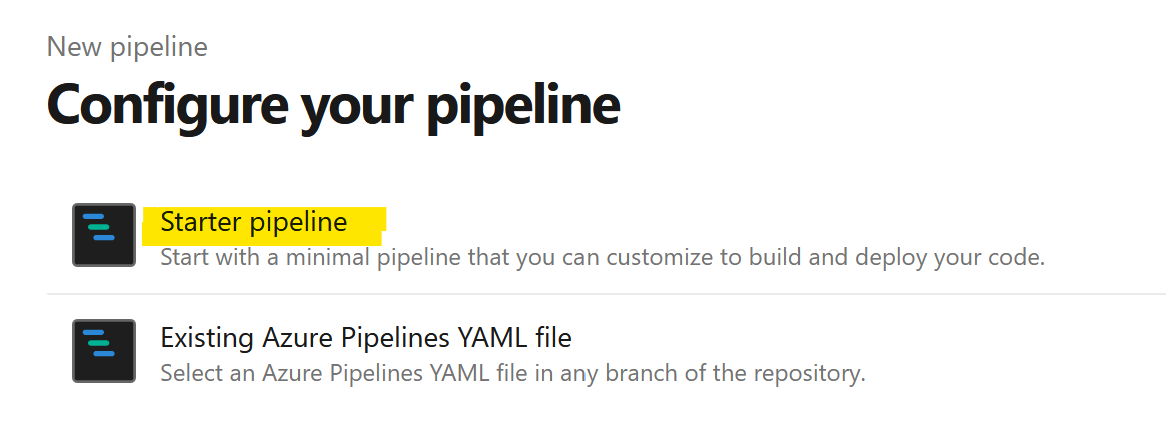
Now that we have the pipeline definition that we want to create dynamically, we will create the actual pipeline that will do the job. We can use a “Starter pipeline” for this:

And write this code inside it:
# manual trigger only
trigger: none

parameters:
  # this parameter is required, no default value
  - name: automationName
    type: string
  # used to conditionally run the last step
  - name: runThePipeline
    type: boolean
    default: true
    displayName: Run the generated pipeline

pool:
  vmImage: ubuntu-latest

variables:
  - name: automationFolder
    value: automatic
  - name: sourcePipeline
    value: pipelines/base-auto-pipeline.yml
  - name: pipelineId

steps:

- script: az devops configure --defaults organization='$(System.TeamFoundationCollectionUri)' project='$(System.TeamProject)' --use-git-aliases true
  displayName: 'Set default Azure DevOps organization and project'

- script: echo ${AZURE_DEVOPS_CLI_PAT} | az devops login
  env:
    AZURE_DEVOPS_CLI_PAT: $(System.AccessToken)
  displayName: 'Login Azure DevOps Extension'

- script: |
    pipelineId=$(az pipelines show --folder-path $(automationFolder) --name '${{ parameters.automationName }}' --query id -o tsv)
    echo $pipelineId
    if [ $pipelineId ]
    then
      echo "Pipeline already exists with id $(pipelineId)"
    else
      pipelineId=$(az pipelines create --name '${{ parameters.automationName }}' --folder-path $(automationFolder) --branch '$(Build.SourceBranchName)' --repository '$(Build.Repository.Name)' --repository-type $(Build.Repository.Provider) --yaml-path '$(sourcePipeline)' --skip-first-run true --query id -o tsv)
    fi

    echo "pipeline id $pipelineId"
    echo "##vso[task.setvariable variable=pipelineId]$pipelineId"
  displayName: "Create pipeline if not exists"

- ${{ if eq(parameters.runThePipeline, true) }}:
  - script: |
      echo "run $(pipelineId)"
      az pipelines run --id $(pipelineId) --branch '$(Build.SourceBranchName)' --variables testVariable='Hello world!'
    displayName: "Run the pipeline"
Step by step explanation
In the first section, I just disabled the triggers so we will run the pipeline manually, I added two parameters to show them in the execution form and some variables we will use in the automation.
# manual trigger only
trigger: none

parameters:
  # this parameter is required, no default value
  - name: automationName
    displayName: Automation name
    type: string
  # used to conditionally run the last step
  - name: runThePipeline
    type: boolean
    default: true
    displayName: Run the generated pipeline

pool:
  vmImage: ubuntu-latest

variables:
  - name: automationFolder
    value: automatic
  - name: sourcePipeline
    value: pipelines/base-auto-pipeline.yml
  - name: pipelineId
The first two steps in the pipeline are there to prepare the environment. The Azure CLI installed in the ADO agent comes with the pipelines CLI that will help us interact with them. We don’t need a Service Connection in this case because the credentials are already provided in a system variable, using the project name $(System.TeamProject) and the Personal Access Token (PAT) $(System.AccessToken) to perform the CLI login:
steps:
- script: az devops configure --defaults organization='$(System.TeamFoundationCollectionUri)' project='$(System.TeamProject)' --use-git-aliases true
  displayName: 'Set default Azure DevOps organization and project'

- script: echo ${AZURE_DEVOPS_CLI_PAT} | az devops login
  env:
    AZURE_DEVOPS_CLI_PAT: $(System.AccessToken)
  displayName: 'Login Azure DevOps Extension'
In the next step, we check if the pipeline with the same name already exists, and then we use the az pipelines create command to create one with the provided name. We are using the previously created parameter ${{ parameters.automationName }}, using the macro language because these values are not passed as environment variables in this case.
We are also using system variables, as the repo name, branch, etc., we provide the path to the yaml file that will be used to create the pipeline, and finally, we store the pipeline identifier that we will use afterward.
We also use the –skip-first-run argument because we want to execute this pipeline in a later step to pass some additional values. This could be useful if we want to add a manual approval or split the work into different stages.
Note: I didn’t use the Jobs and Stages separation, because, in each job the context is restarted, this would force us to perform the ADO login in each phase, and by now this step takes a long time and would slower our pipeline. Take this in mind if you want to split the pipeline into different jobs or stages.
pipelineId=$(az pipelines show --folder-path $(automationFolder) --name '${{ parameters.automationName }}' --query id -o tsv)
echo $pipelineId
if [ $pipelineId ]
then
    echo "Pipeline already exists with id $(pipelineId)"
else
    pipelineId=$(az pipelines create --name '${{ parameters.automationName }}' --folder-path $(automationFolder) --branch '$(Build.SourceBranchName)' --repository '$(Build.Repository.Name)' --repository-type $(Build.Repository.Provider) --yaml-path '$(sourcePipeline)' --skip-first-run true --query id -o tsv)
fi
One interesting characteristic is that we are using the same pipeline definition file (the pipelines/base-auto-pipeline.yml) to create many pipelines from it, so, modifying this one yaml file would update all the pipelines created from it.
There’s a special line used to fill an environment variable that will be needed in subsequent steps. Each script or bash step is executed inside a new .sh file with the provided script, so, to guarantee we can pass values through the different contexts, we need to rely on the ADO pipelines agent to do it by injecting the variables:
echo "##vso[task.setvariable variable=pipelineId]$pipelineId"
Note: if you are going to use stages, you must indicate that you are assigning an output to pass the information between the different jobs.
Finally, we execute the pipeline with the id we obtained before and will use the parameter to have a conditional execution. We can assign some values to the pipeline using the command-line like we can see here with the testVariable:
- ${{ if eq(parameters.runThePipeline, true) }}:
  - script: |
      echo "run $(pipelineId)"
      az pipelines run --id $(pipelineId) --branch '$(Build.SourceBranchName)' --variables testVariable='Hello world!'
    displayName: "Run the pipeline"
Pipeline execution
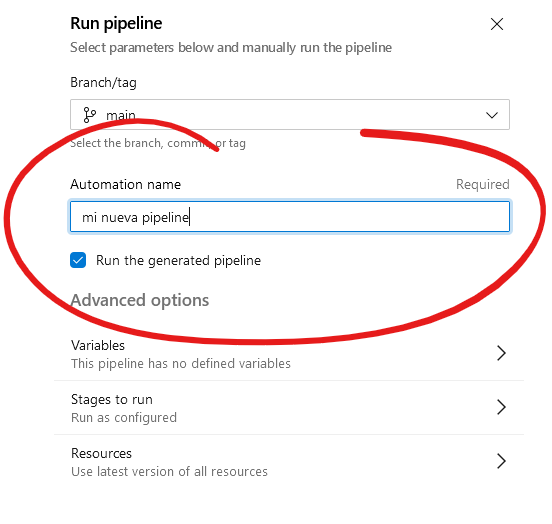
Now, we can execute the pipeline. In the execution form we will find the different parameters we indicated before:

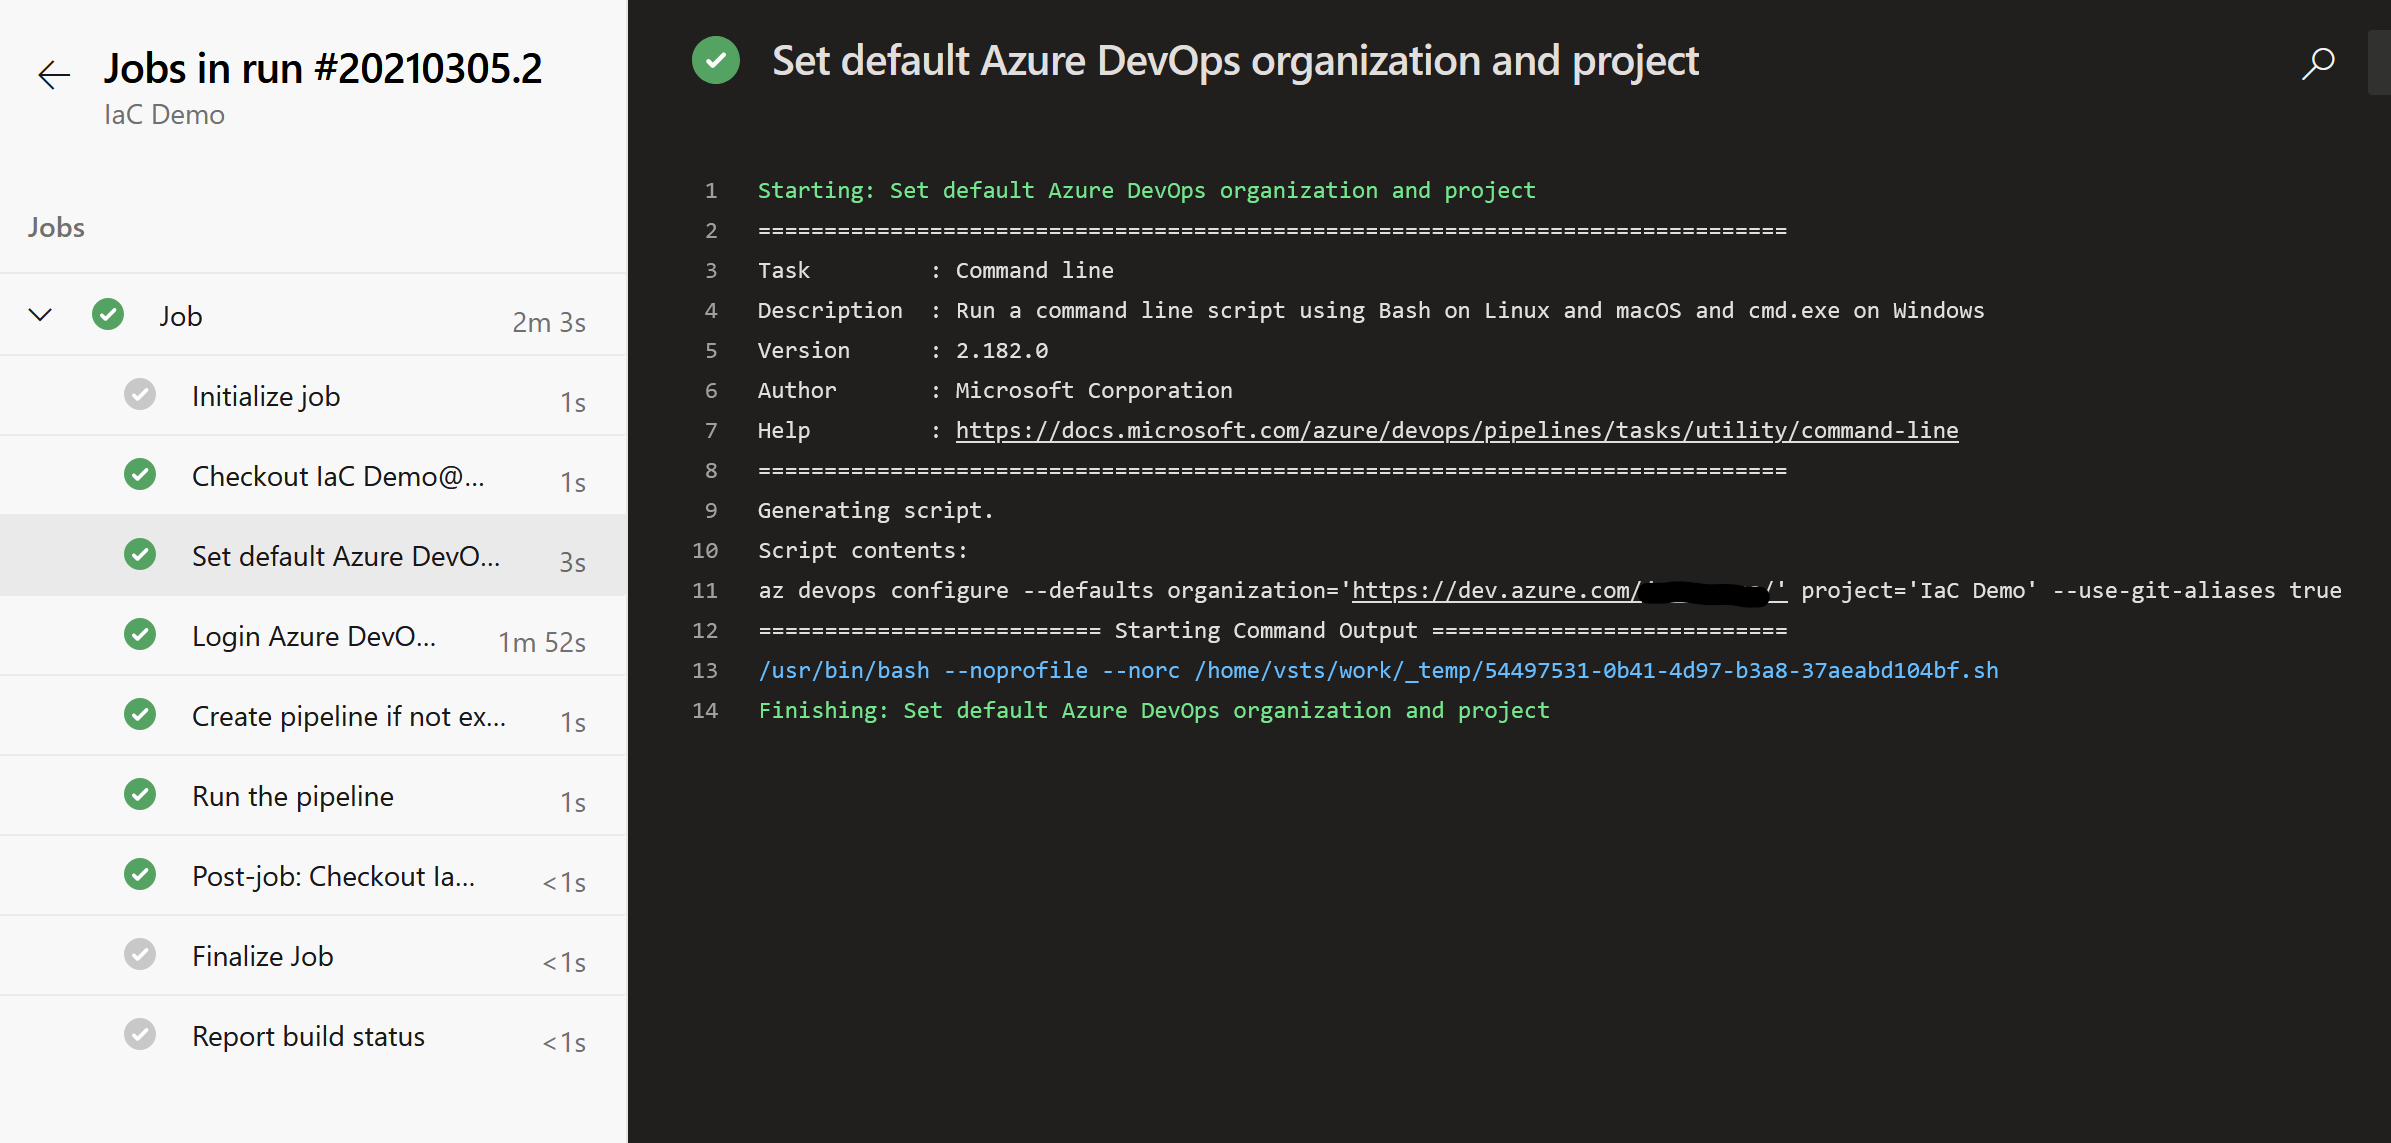
And then we will see all the steps running:

Link summary
- Azure DevOps CLI Extension
- Azure DevOps pipelines CLI
- Variable definition in ADO
- Pipeline creation using the CLI
- Typed parameters in ADO pipelines
- Pipeline phases
- Outputs between jobs
Credits
- Header picture by Pierre-Alexandre Garneau.